• About
  • Portfolio
  • Studio
  • At Home
  • On Location
  • Portfolio 2015
  • Portfolio 2016

Ruud van Gaal

~ Photography

Ruud van Gaal

Category Archives: tips

Post processing workflow

10 Saturday Feb 2018

Posted by Ruud van Gaal in photography, postprocessing, tips

≈ Leave a comment

Tags

post, postprocessing, tutorial

When post-processing photos, not all of them require the same steps. But still, I’m following these steps roughly every time I edit a picture. Note that the workflow changes somewhat over the years as I learn new things, or just get new tools, or my style changes.

  • Take pictures in RAW. RAW gives you more bits to play with (at least 12 bits), where JPEG only supports 8 bits. Each bit is a two-fold improvements, so from 8 to 12 bits gets you 2*2*2*2 = 16x more levels for each color.
  • Use a tablet. This might be preferences, because I’ve done pencil drawing in the past, and generally like the feel of painting/drawing. Making physical contact with something that feels like it has structure feels so much more creative than using a mouse to move a pointer.
  • Open the image in Adobe Photoshop, first making slight adjustments in the RAW import for exposure so you use the RGB range optimally. Use the histogram to check that roughly. I sometimes underexpose a little, especially under varying lights conditions, since (with digital photography) it’s easier to get back detail in shadows than to get back details in highlights.
    Also I check the white balance and correct that a little bit so it looks relatively natural (although I often tend a little to the warm side, so higher temperatures).
  • The first step (packed into an action) is to duplicate the original. This allows you to always compare the edits to the original photograph.
  • Use the spot healing brush to blot out imperfections. There is also the clone stamp which many people use, and while that gives slightly better results, I hardly ever use it, as the spot healing brush does the job nice enough for me. I change the size of the brush around to be slightly larger than the spots I correct (use the [ and ] keyboard shortcuts to work quickly).
  • Duplicate the layer (Ctrl-J) and use Liquify (Ctrl-Shift-X). Optionally increase the hair size (a trick I learnt from Irene Rudnyk; she works super-destructively but the end result is still great).
  • Next is skin retouching; I usually use Totally Rad’s ProRetouch v2.0 for that. A pass of ‘Skin: Foundation Strong’ and ‘Skin: Magic Eraser’. The first reduces contrast and does slight blurring, the 2nd one more blurring. Applying this gently through masks allows retouching of the skin without overdoing it.
    The first filter does take away some of the highlights, which we’ll bring back later on with dodging and burning.
  • Next is that dodging and burning; I create 2 curves layer; one which lightens everything up (just drag a center point up slightly) and another which darkens things. I add an empty mask so initially both layers have no effects (I have wrapped all this in an action for speed). Then I start adding in highlights and shadows with a soft 20-30% brush. With the shadows I accentuate the cheekbones mostly, and adding some depth to some shaded areas. Sometimes when some body parts are lighter than the face, I used the shadow curve adjustment layer to reduce that in brightness as well. It can be used to make the makeup around the eyes slightly darker too, to enhance the size of the eyes.
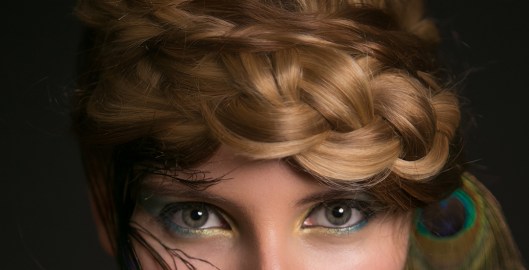
  • Then I do a pass on the eyes; 3 aspects really. First is the sharpness; I add some sharpness to the eyes to make them pop out a bit more. I also use the same layer often to sharpen the eyebrows a bit, plus the lips.
    2nd is using a soft white brush in a layer set at ‘Soft Light’ to brighten up the irises. Since I like adding contrast in post, the eyes can get too dark otherwise.
    Note that irises are located at depth inside the eye, so add brightness at the opposite sides of the lights. If the light comes from above, add brightness at the bottom of the iris. If the light comes from the left, add brightness at the right side of the iris (as seen from the monitor, not from the model).
    The 3rd is an optional paint layer where I reduce bags under the eyes by painting over a lighter color. Like with every layer you have to be really careful to apply the right amount. On the other hand, this is where your style is visible and some may like it more natural, others more over the top.
  • Before color grading I sometimes add extra punch to the hair, for example using RadLab’s ‘Hair: Brunette Shine’ action.
  • Last comes color grading, or conversion to black & white. This has varied over the years. I sometimes do a conversion to a Smart Object on which I can apply effects from the Nik Pro collection. Lately I’ve been using simpler LUTs from IWLTBAP.
    It’s a mix now really between LUTs that are masked, a color balance layer to adjust some parts of the image.

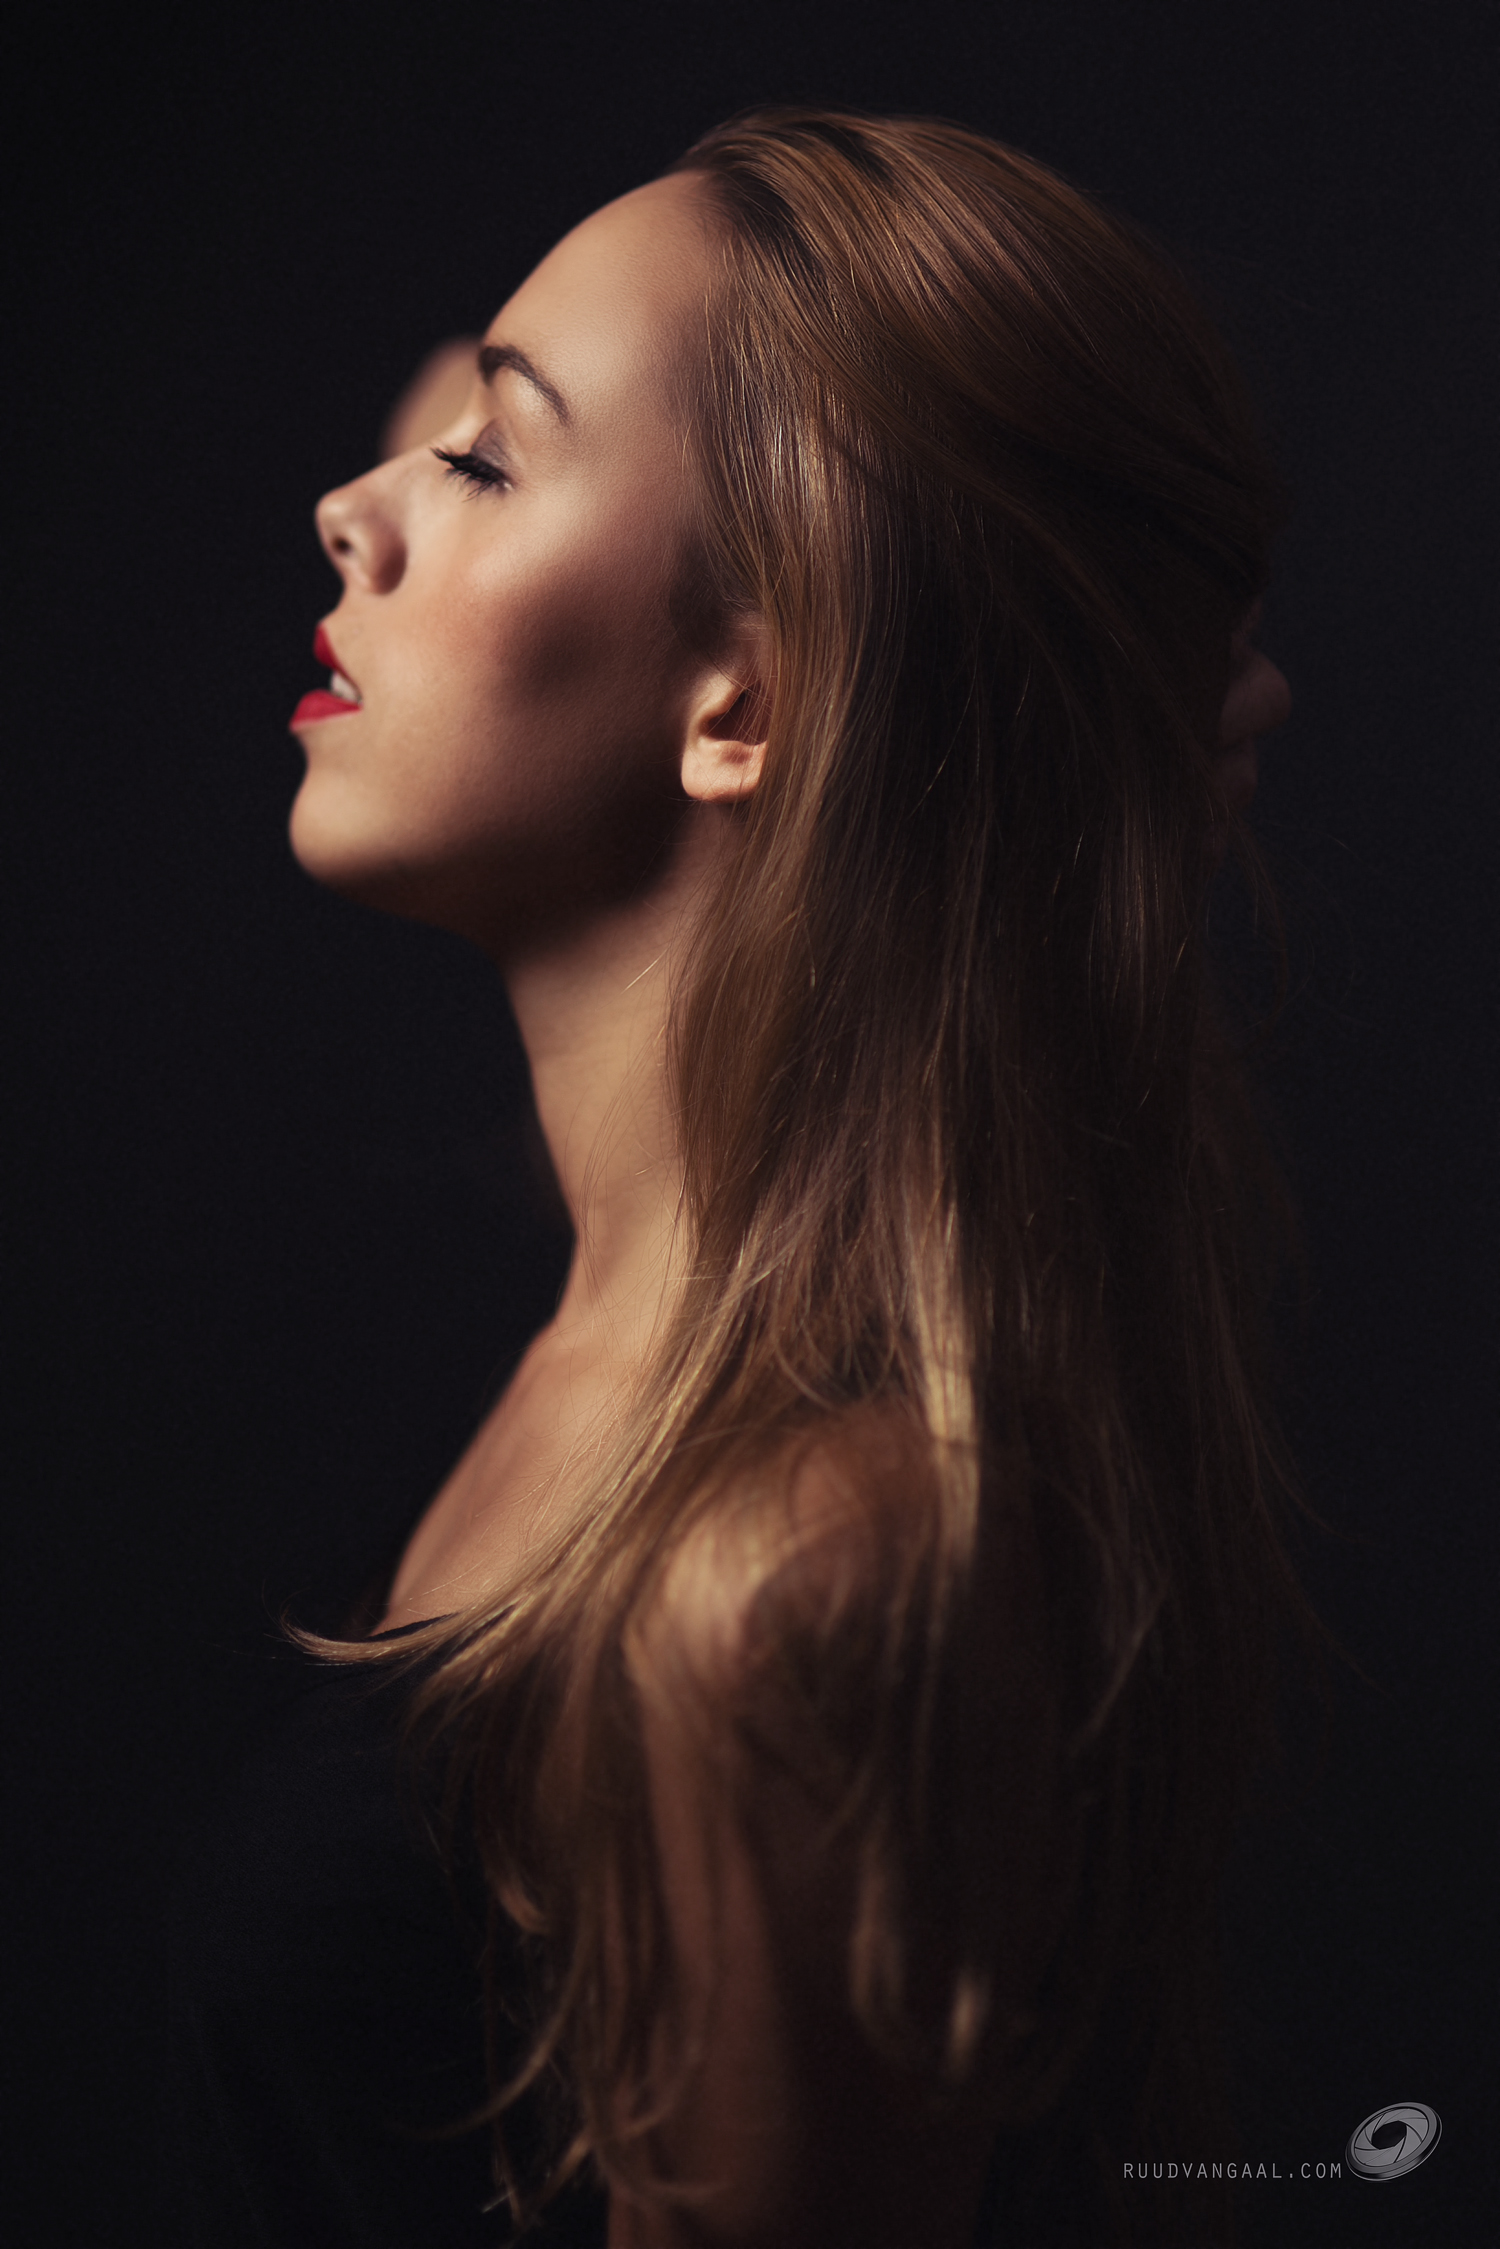
I’ve been writing this flow when doing the picture shown below. Hope this is of any use to you. 🙂

before_after

Tethered shooting with the Canon 6D

26 Monday Dec 2016

Posted by Ruud van Gaal in photography, studio, tips

≈ 2 Comments

Tags

6d, canon, live, tether, tips, wifi

In my home studio setup I have the option to display photographs live on a big TV screen. This is called tethered shooting. I will explain how I link up my Canon 6D, with WiFi, to the TV screen. This is a technical article, but I hope this may be useful to people trying to achieve a similar thing.

First, there is an alternative: Lightroom; it is supposed to support tethered shooting from a lot of cameras directly. I have never tried it though and chose my own setup for a few reasons: I don’t want to depend on Lightroom, I want to always see a fullscreen image, and I want to be able to add some special effects, such as presenting in black & white immediately. I will describe here how I got it working.

Hardware

The hardware that I use is this:

  • A Canon 6D.
  • A WiFi network.
  • A laptop running Windows (Windows 7 in this case, but Windows 10 should work the same).
  • A television, which is connected to the laptop’s HDMI output.

Software

The software flow that I use is this:

  • WiFi is enabled on the 6D, which makes a connection between the camera and laptop. There are other articles on the internet which describe how to connect the 6D to an existing WiFi network.
  • The Canon 6D takes a picture.
  • The camera sends this picture towards Canon’s EOS Utility.
  • EOS Utility detects this and starts ‘external software’, which is my own software, ViewImage.
  • ViewImage then displays the new photo, resizing upto fullscreen, and optionally immediately presenting it in black & white.

Let’s go over these steps in more detail. The 6D connects to an existing WiFi network. How to do that is described in other articles on the internet. The camera can function as an access point itself, which is the ‘Camera Access Point’ feature. I have it in Infrastructure mode, so it connects to my existing WiFi network. This has the advantage that the laptop can connect to the internet through its regular WiFi connection; I use that to play music during the shoot, connecting to Spotify for example. And I wonder if the Camera Access Point doesn’t unnecessarily drain the battery of the 6D.

Then I take a picture. I usually take RAW pictures, but for this setup I also save an added JPEG image. You can specify this in the camera’s menu; the first tab, then ‘Image Quality’. I usually have it at M-RAW+S2 or S3. S3 is the smallest JPEG variant at 720×480 pixels, and is nice and quick for the WiFi connection, and still looks ok on a FullHD (1920×1080 pixels) TV screen.

Canon EOS Utility

I have paired the camera with Canon EOS Utility. There are three versions of EOS Utility; I used version 2, but I also got version 3 to work. The first version is very old, but version 2 and 3 (the latest version was v3.5.10 at the time of writing) can be used.

The camera’s WiFi settings I use:

  • Communication mode: Remote control (EOS Utility)
  • Infrastructure (connect to existing network)
  • IP address: auto assign (this depends a bit on your network but is generally what you want).

Then it’s important to let EOS Utility grab your photos as they come in. Let’s go over the settings in detail. The basic settings make sure the Utility starts in ‘Remote shooting’ mode as you turn on the camera and make a connection with the laptop (after having paired camera to laptop, the utility should start automatically when turning on your camera). To make sure that the camera is seen, I have checked the ‘Add WFT Pairing Software to the Startup folder’option.

pref_basic_settings

Next is the Destination Folder. I store my temporary shoot images in c:\dump\fotos. Note that these are just temporary JPEG files; the real images are stored in RAW on the camera. So it doesn’t really matter if you lose the images in c:\dump\fotos.

The image shows that I have checked the ‘Download images’ option, so that new images get transferred from the 6D to the laptop. I don’t think the other options do anything in this setup, because of the upcoming options in the ‘File Name’ tab.

pref_destination_folder

Next is the filename converter; I have this turned off (‘Do not modify’).

pref_filename

Then, I choose to download images that have not yet been downloaded, to avoid EOS Utility transferring all images that are already on the camera (which may be plenty).

pref_download_images

The next tab is very important and contains the link to my own displaying software. It’s not a standard piece of software so you have to click ‘Register’ and fill in these details. I have put my software in c:\dump\fotos\viewimage\. Notice that ‘JPG’ is checked, so viewimage.exe will be started with every new .jpg file.

pref_linked_software

Then an important one; in the Remote Shooting tab: in EOS Utility v2 you have the option ‘In RAW+JPEG mode, only transfer JPEGs to the computer’. This needs to be on to avoid sending RAW files over WiFi. If your WiFi is fast enough, by all means, go ahead and transfer both, as this automatically makes a backup of your photos. But in my case, it is far too slow and needs to be as shown below:

pref_remote_shooting

If you have version 3 of the EOS Utility, this option is removed and put in a different location. When the camera is connected, click in the area indicated by the red circle to do the same thing. Select ‘Computer and memory card’ and check the ‘only transfer JPEGs to the computer’.

raw_jpeg_eos_utility_v3

The time settings here are probably irrelevant, but shown for completeness.

pref_time_settings

Then the next step is ViewImage.

ViewImage

ViewImage is software I wrote especially for this purpose. I wanted to display the images fullscreen, and optionally in black and white. I googled around quite a lot, which makes you end up at using a Windows & Fax Viewer DLL for example. The problem there is that the image was never rescaled to fit the entire screen, and that there was not much control.

I have uploaded a full installation of ViewImage at http://kodakmomentje.com/download/viewimage.zip . Just unzip it in c:\dump\fotos\viewimage\ for example, as I have done.

Configuration can be done by editing the viewimage.ini file with something like Notepad. The useful settings are:

  • resolution.width and resolution.height; these determine the window size. If you have a FullHD screen, set these to 1920 and 1080 respectively, for example.
  • resolution.fullscreen; if set to 1, the window will try to take over the entire screen. This is what I use during shoots.
  • app.startup_directory; the directory in which your photos are dumped by Canon EOS Utility. If you used my directory setup, c:\dump\fotos\, there is nothing you need to do.

Live Control

Now everything should be set up. During the shoot, when turning on the camera, Canon EOS Utility should appear (it may take a while). When taking a picture, ViewImage should come up and display it. When taking another picture, ViewImage will show the new image.

There are some keyboard shortcuts you can use in ViewImage:

  • C – show the image in color
  • B – show the image in black & white
  • I – toggle the info on the image
  • Left/right – walk through the images in the directory.
  • ESC – quit ViewImage.

What I often do is take some pictures and just let it roll. You can review images by scrolling back a bit by pressing the Left cursor key. When taking a new image this new one will automatically take over again.

Conclusion

I spent a lot of time before I had a nicely working setup, so I hope this article will help others into creating a useful tethered setup for their situation.

I may have skimmed over the pairing details a little bit too fast; I may elaborate on that later.

Double Exposure

19 Saturday Mar 2016

Posted by Ruud van Gaal in photography, postprocessing, tips

≈ Leave a comment

Tags

bw, chanelle, doubleexposure

I recently tried a bit of the double-exposure effect. This works quite effectively when using two silhouette type images. I wanted to start out with this photo though:

IMG_6757_org_colFB

That took a bit of photoshopping to invert. Then I took a smartphone shot I took while running of a tree near my home and put that on top. The basic idea is to have a regular background image (the head in this case) and overlay the other silhouette image above that and change the layer blending mode to ‘Screen’.

In practice, I used quite a bit of masking to get the effect constrained to the areas I wanted to. This is what I ended up with:

IMG_6757_bwFB

Thanks to Chanelle for posing in the original image!

Postprocessing hair

25 Friday Dec 2015

Posted by Ruud van Gaal in photography, tips

≈ Leave a comment

Tags

filters, hair, photoshop, tips

Taking pictures with a camera is only half the job. Postprocessing, making the photo stand out a bit more is an essential part of every photographer. Whether this is in a dark room or in Lightroom, Photoshop or anything else is irrelevant; you have to take care of how you present an image.

One small processing trick I lately found is how to improve hair slightly and realistically.

We start out with the original photo, straight from camera (thanks to Ayten of La Rouge visagie for the styling, and Lisanne for posing).

hair2

Part of my workflow is Totally Rad!’s Pro Retouch action set in Photoshop (and no, this article is not sponsored, it just works quite ok for me). These allow me to do most of my postprocessing non-destructively and relatively fast. One of the actions is called ‘Skin: Foundation strong’, and it makes the skin smoother without destroying texture. I have noticed a long time that it also does wonders for hair, making it look better. Not something you’d expect from a filter that it designed for skin, but that’s where experience comes in.

I’ve applied it below to the hair.

hair3

Notice how it softens contrast, but alas also introduces some blurring. We can rectify that with a simple Unsharp Mask:

hair1

All post-processing is personal of course, but I tend to like this softer look often, and apply it some photos.

High speed sync (HSS) with ordinary flashes

09 Monday Nov 2015

Posted by Ruud van Gaal in photography, studio, tips

≈ Leave a comment

Tags

flash, tips

I have a home studio which is not small, but also not that large. I own a couple of flash heads, ranging from 150Ws to 400Ws. My most used flashes are Linkstar ones of 250Ws and 400Ws.

LF-400 with Yongnuo YN-622C

Linkstar LF-250 with Yongnuo YN-622C

I shoot mostly portraits and like low diaphragm settings like f/2.8 (or lower with fixed focal length lenses) to get depth of focus effects where the eyes are sharp, but sharpness quickly falls off when you look at hair or the body. That effect has always been one of my big incentives to switch from simple small cameras to larger, fullframe camera bodies. Currently my main body is a Canon EOS 6D, which features a fullframe sensor, and lots of light sensitivity.

The flashes in my studio generate quite a bit of light, and especially when balancing multiple lights it’s easy to get more light than really desired to stay low enough to be able to use something like f/2.8, even if you lower the ISO to 50. Also, as 100 ISO is probably the ‘native’ mode for the sensor, I like to stay up there. But what to do with the abundance of light?

When I started out, I used cable to flash. I quickly turned to wireless triggers, a Cactus v5 set. The maximum (or should I say minimum) exposure time is around 1/180s for Canon upto 1/250s for Nikon, depending on the model a bit.

To keep light under control, I then turned to ND-filters. A stop of 3 or 4 can give you a lot of control in this small environment, but the downside is that your viewer also gets darker, and your automatic focus suffers to the same degree. Fortunately the 6D has excellent focusing skills, but still, it was less than perfect.

Then lately I discovered the Yongnuo YN-622C E-TTL wireless remote triggers. The ‘C’ stands for Canon btw, but there is a version for Nikon as well. These talk TTL to the Canon body, which means you suddenly get HSS – High Speed Sync. In layman’s terms this means that you can finally dive under those 1/180s times.

Wireless triggers capable of talking E-TTL to the body

Wireless triggers capable of talking E-TTL to the body

I really discovered them when buying an outdoor kit; a Jinbei Discovery DC1200 battery flash unit. To get these to do HSS, you need to connect them with a small cable, instead of using the triggers supplied by Jinbei. If you use the built-in remote trigger, you can’t do High Speed Sync. It took a while for me to figure that out.

After that I noticed that the same method works with my fairly standard Linkstar LF-250 and LF-400 flashes. I could get rid of the ND filters (which will only give you less sharpness if they get dirty) and just use 1/4000s if I wanted to (the 6D doesn’t go any quicker than that).

So now the 400Ws power is no longer an issue, and I can shoot upto f/1.4 without problems in my 5x5m studio.

Darkness falls across the studio

04 Wednesday Nov 2015

Posted by Ruud van Gaal in studio, tips

≈ Leave a comment

Tags

bw, indoor, studio

In my studio, I have a fairly standard Manfrotto 3-bar background paper setup, where I can easily roll on or off three different colors of background paper.

Throughout the years, I’ve moved from using colored backgrounds, such as red and blue, towards gray tones. I ended up a month or so ago with black, white and a light gray. Now, I’ve moved out the white background. Why? It seems I often find the white background unnecessarily white, and can use the slightly darker gray as well.

Below are three shots, starring my trusty bodypainted bust (thanks to Belinda for the bodypaint, so it actually has a skintone color instead of being flashing white!). The top color is the light gray (Savage Slate Gray), the bottom color is Savage Smoke Gray.

IMG_7240

Although it still looks kind of dark, I noticed while shooting with actual people and actual shots that the skintone of people quite nearly matched that of the background (in light areas of skintone). I often like the background to be darker though, so that the entire body stands out. With the light background, I can simulate white now, since it’s already quite light. With the darker Smoke Gray, I can go a step further, making moody images without going full-on with a black background paper.

Here is a shot with the light Slate Gray. Note that here things appear a little darker than with actual human subjects (unfortunately).

IMG_7241

And a shot with the darker gray, Smoke Gray. This gives more contrast, without really going towards black. I know, you can get black by moving the subject away from the background, but my studio is not that large and I like a bit of shadow to get a bit of 3D feel.

IMG_7242

I should redo this test with an actual model probably. But for now, I have the three colors light gray (slate), smoke gray and black hanging. Looking forward to the next shoot to try it out!

Color grading

24 Saturday Jan 2015

Posted by Ruud van Gaal in postprocessing, tips

≈ Leave a comment

Tags

color grading

While shooting, I never actually add a white balance type shot featuring a color reference card (such as an X-Rite Color Checker). Though these may be helpful when trying to get back a lighting situation if you shoot over more than one day (since you may have trouble getting lighting to match), I’ve never been too interested in achieving a perfect true-to-life color balance.

When post-processing photos from my shoots, I always do my processing in the original white balance, which should be close to real-life. At the end though, I always add some color grading to purposely add some colorizations to the image. I think it just looks cooler (pun not intended; I often warm the image up in fact 😉 ).

An added step also is to add some drama; I have an action which simply does this:
– add a Black & White adjustment layer;
– set that layer’s blending mode to Overlay;
– add a layer mask.

I lower the opacity of the entire drama layer first, to match the most dramatic part of the image, and then I refine it using a mask.

As an example, look at the following two images; the first is the original, the 2nd has a Black & White adjustment layer added at 100%. It’s a simple method and often a mask is needed to avoid drowing shadowy areas such as the eyes, but it’s a simple technique to add some punch to your photos.

IMG_7241IMG_7241_drama

Color grading itself could be an entire study. An interesting video that explains it for film is at http://vimeo.com/65617394

In Photoshop though, an always-interesting Phlearn tutorial shows how to do things in Photoshop; see http://phlearn.com/how-to-apply-cinematic-color-grading-to-your-photos

These two videos are a great introduction to learn more about bending your colors in Photoshop, to give a more special mood to your images.

Follow Ruud van Gaal on WordPress.com

Archives

  • March 2020 (1)
  • February 2020 (3)
  • January 2020 (2)
  • December 2019 (2)
  • November 2019 (1)
  • October 2019 (1)
  • July 2019 (1)
  • April 2019 (2)
  • March 2019 (2)
  • February 2019 (1)
  • November 2018 (1)
  • August 2018 (1)
  • July 2018 (1)
  • June 2018 (1)
  • May 2018 (1)
  • March 2018 (2)
  • February 2018 (1)
  • January 2018 (1)
  • December 2017 (1)
  • November 2017 (1)
  • October 2017 (2)
  • August 2017 (2)
  • June 2017 (1)
  • May 2017 (2)
  • April 2017 (2)
  • March 2017 (3)
  • December 2016 (6)
  • November 2016 (3)
  • October 2016 (4)
  • August 2016 (10)
  • July 2016 (7)
  • June 2016 (9)
  • May 2016 (5)
  • April 2016 (4)
  • March 2016 (7)
  • February 2016 (11)
  • January 2016 (6)
  • December 2015 (12)
  • November 2015 (12)
  • October 2015 (14)
  • September 2015 (3)
  • August 2015 (4)
  • July 2015 (7)
  • June 2015 (6)
  • May 2015 (7)
  • April 2015 (11)
  • March 2015 (18)
  • February 2015 (13)
  • January 2015 (7)
  • December 2014 (4)
  • November 2014 (7)
  • October 2014 (1)

Categories

  • home (8)
  • outside (20)
  • photography (234)
  • postprocessing (7)
  • studio (96)
  • tips (7)
  • travel (2)

Blog at WordPress.com.

Privacy & Cookies: This site uses cookies. By continuing to use this website, you agree to their use.
To find out more, including how to control cookies, see here: Cookie Policy
  • Follow Following
    • Ruud van Gaal
    • Join 104 other followers
    • Already have a WordPress.com account? Log in now.
    • Ruud van Gaal
    • Customize
    • Follow Following
    • Sign up
    • Log in
    • Report this content
    • View site in Reader
    • Manage subscriptions
    • Collapse this bar
 

Loading Comments...