
Taking pictures with a camera is only half the job. Postprocessing, making the photo stand out a bit more is an essential part of every photographer. Whether this is in a dark room or in Lightroom, Photoshop or anything else is irrelevant; you have to take care of how you present an image.
One small processing trick I lately found is how to improve hair slightly and realistically.
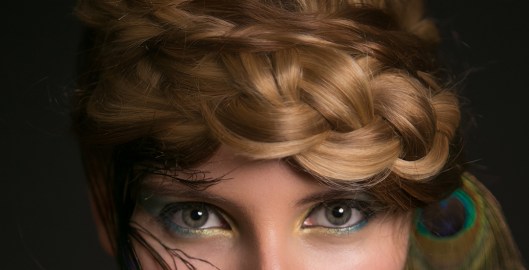
We start out with the original photo, straight from camera (thanks to Ayten of La Rouge visagie for the styling, and Lisanne for posing).

Part of my workflow is Totally Rad!’s Pro Retouch action set in Photoshop (and no, this article is not sponsored, it just works quite ok for me). These allow me to do most of my postprocessing non-destructively and relatively fast. One of the actions is called ‘Skin: Foundation strong’, and it makes the skin smoother without destroying texture. I have noticed a long time that it also does wonders for hair, making it look better. Not something you’d expect from a filter that it designed for skin, but that’s where experience comes in.
I’ve applied it below to the hair.
Notice how it softens contrast, but alas also introduces some blurring. We can rectify that with a simple Unsharp Mask:

All post-processing is personal of course, but I tend to like this softer look often, and apply it some photos.
